Skip to content

March 29, 2022

Creating an old school story with modern techniques: Edward and the Ghost

Development
Making a drawing of Edward and the Ghost on a tablet

Originally started as a macabre children’s book, Edward & The Ghost came alive through digital storytelling in a web-based interactive storybook. Wanting to showcase their abilities and at the same time use it as proof of concept for similar future projects, Once Storytelling created this first chapter of the story as a passion project. The story itself was meant to make death less scary for children.

Art direction

The style choices for Edward and The Ghost were based on that same concept: they gathered inspiration from old black and white Disney cartoons of the 30’s and the slightly morbid Gashlycrumb Tinies. Alternating cute and sinister elements, they take the audience on an interactive journey, always in that same vintage style and feel. At Little Miss Robot, we collaborated with Once Storytelling to transform the arts and crafts of this style into an interactive audiovisual application using the latest and most performant technologies.

Making a drawing of Edward and the Ghost on a tablet

Scenes

To stage the story, we created six different scenes, each with a distinct background, animations and audio. These scenes are used to set the mood for each part of the tale and guide you through the different parts of Edward’s story.

Creating scenes in Pixi

The Pixi application, like the story itself, is built on a mixture of six different scenes. Each scene is separated into three parts. The scene itself where all the objects placed onto the scene live. The foreground where we render the overlaying particles and the filtering effects like the old movie filter. Finally, to finish it off we have created a debug” layer where we can view and create the different hitboxes, used in development only. Dividing the application in scenes allows us to only load the assets for that scene and make sure that no unnecessary assets are loaded to keep the loading times to a minimum for the user. In turn, dividing the scenes into different layers allows us to avoid conflicts between layers and separate the concerns to their own scopes.

Screenshot of the Pixi application

In technical terms, each scene is created as a Pixi Scene, which loads in objects from Pixi like AnimatedSprite, Container, Graphics, and so on. Each of these objects are extended by our own custom objects that enables us to write our own layer of functionality on top of the functionality that Pixi offers without neglecting any of Pixi’s awesome features!

Cel animations

Edward & the ghost is created by using an old technique called Cel animation, where 2D animations at that time were drawn frame by frame on sheets of transparent paper. This takes a lot longer than modern digital methods, but it conveys the vintagey, sinister feel that Once really wanted to portray. It was up to us at Little Miss Robot to incorporate this ancient technique into a contemporary experience. Instead of drawing on sheets of paper, we used layers in Photoshop to fabricate the modern equivalent. We continued drawing on the same frame, whilst overlapping each layer.

Screenshot of how we made animations using Photoshop

Texture packer

For the animations, each frame was delivered as a separate image. If we wanted to play an animation, we would have to load every image and then play every image separately after each other. These animations could range up to 100 images. Loading in 100 different images into the browser for just one animation would lead to too many HTTP-requests which is not efficient. We wanted to avoid loading every image as a separate entity into the memory of the browser.

So in order to fix this issue, we used the magic of Texture Packer to wrap all these separate images into one combined image that is supported by a JSON file. This combined image contained all the images to create the animation, placing the images as close as possible next to each other, making sure that no irrelevant whitespace was lost and as a result trimming down the filesize. As an extra bonus, Texture Packer even removed any duplicates that were necessary to create a slowdown in the animation and saved that information in the supported JSON to indicate how long an image should be shown before switching to the next image.

Texture Packer spritesheet with combined images of Edward and the Ghost

Other than that, the supported JSON file generated by Texture Packer contained all the coördinates of these images within the generated image. This JSON file was then used by Pixi to play the animation regardless where the separate image was placed within the big generated image. Texture Packer allowed us to automatically generate these assets with ease.

The old-school style contained limited colours, mostly grey tones. This meant we could adjust the Texture Packer to export the spritesheet in PNG8, without worrying about visible colour loss. PNG8 supports only 256 different colours, allowing us to create a smaller file size compared to PNG-24 or PNG-32.

Example of Edward and the Ghost export in PNG-32 and PNG-8

As a result the browser only has to load one image and shift focus, it works more efficiently than when it has to load image after image in the graphic memory. Combining sprite sheets with their respective JSON file lets Pixi over the individual images et voilà, the animation emerges before your eyes.
 

Creating an old school look

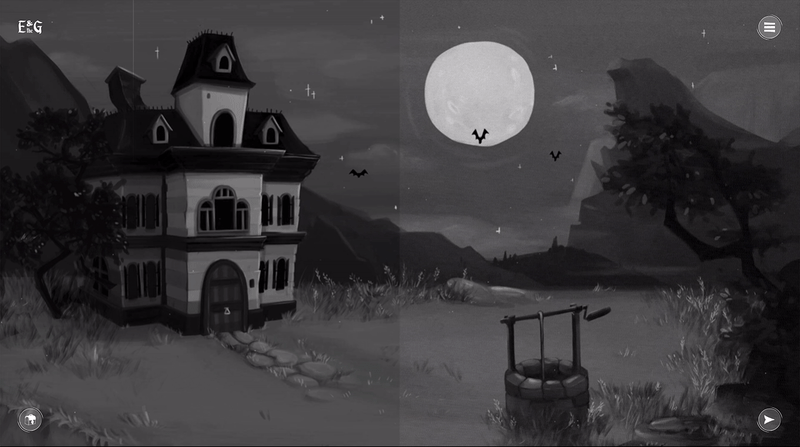
To amplify the vintage feel we created with the cel animations, we added more visual effects to lure people further into Edward’s tale. We played with framerates, filters and vignettes.

Framerate

The first trick we pulled from our sleeve was to use a framerate of 12 frames per second instead of the 60 fps that is standard practice now. 12 fps gives a slightly jumpy look to your animation and was commonly used in the animations we drew our inspiration from. It also massively reduces the amount of drawing work for our animators, so we won’t pretend that wasn’t a factor. We still used the smoothness of 60 fps for small animations like the eyes following other moving animations or following your pointer across the screen, which gives the application that high-end feel we are used to on modern devices.

It did present us with the challenge of combining 2 framerates in 1 application. We used the AnimatedSprite, provided by Pixi, to animate the spritesheets with 12 frames per second. Simply extending it and changing the animation speed solved this issue and the rest was done by the magic of Pixi.

Part of code for Edward and the Ghost using AnimatedSprite

Old Film Filter

Pixi becomes even more amazing, as it offers a variety of filter options, one of them being the OldFilmFilter. Our designers totally loved it, bringing them so much joy that resulted in tears of happiness. We used this drastically in the whole storybook to create the scenery.

Animated scenery of Edward and the Ghost where the OldFilmFilter is used

But before applying this awesome filter, we checked if it had a large impact on the performance of our application and how well it worked with our already existing features. Pixi filters make use of Shaders within a WebGL context. These renders are all happening on the GPU side of things, the CPU is not being used to drastically calculate everything, this relieves a lot of stress that the CPU has to deal with, creating a more stable whole. After running a couple of tests and playing around with it, we luckily didn’t see a huge impact on performance and could afford to implement it next to the other features. By adjusting the settings of this OldFilmFilter, we were able to change the filter to our desired style, perfectly fitting the story and resulting in happy designers.

Part of code of Edward and the Ghost filter using OldFilmFilter

Vignette
 

The last visual trick we played was introducing a vignette. Instantly the darkening of the outer edges of the screen gives a vintage feel, but it actually serves a double purpose. The vignette also acts as a transition between scenes, by blackening out the whole view while going inward and then revealing the next scene while opening up again. Whilst being a cool trick in the visual department, this black-out’ simultaneously gives us time to load new assets and do some memory management of the old unneeded assets.
 

While developing, we tried different ways of creating a vignette. For example: masking with CSS clip paths, using svg filters, and other work-arounds . Performance wise, some of our try-outs were troublesome, creating a dip in our framerate. Especially when the vignette started animating. Eventually we ended up using a radial gradient as a mask for a circle, which we in turn animated to create the vignette effect. We noticed that this was one of the more performant ways to apply this feature within the context of the project.

In technical terms: the <ellipse /> receives a style attribute, which determines the scale of the ellipse. To animate this value, we used the magic of GSAP.

Part of the code for the Edward and the Ghost vignette
Animated vignette of the Edward and the Ghost with black-out effect

Audio

Although so far we only spoke about visual effects and animations, sound is not to be underestimated in the process of setting a scene. By using different sound effects – triggered by user interactions – we created an even more immersive experience,

To keep everything within the same ecosystem, we used PixiJS Sound to generate different sound instances that can be called within PixiJS when a user interacts with the story.

After developing the entire story without sound, it was truly a blessing to enrich the scenes with audio. This created a whole new dimension to the entire experience, making it an overall different adventure. It’s amazing how much effect sound can have!

Bringing it all together in Vue

Setup

Working with frame by frame animations can take a huge toll on a website’s performance. We did our research on how we demand minimal browser requirements with a maximum amount of experience. As the main building blocks for our website, we chose to work with the progressive framework Vue for creating our user interface and PixiJS which allowed us to create a rich, interactive graphic experience. We used Vue.js as the main JavaScript library because we like its simplicity and the way templating is done, which enabled us to create diverse and flexible components.

Preloader

As you can imagine, this chapter of Edward & The Ghost consists of so many interactive elements that loading time can become an issue. To cut back on loading time and make the experience more enjoyable we make use of preloading.

In order to make the application load, we split up the loading of the assets in various steps. When the application first starts it will load all the assets which are used throughout the entire application. Next to that, it also loads the first chapter of the story. When the first chapter starts, the assets for the next chapter start loading in the background. Once the next chapter has started, all the assets are loaded and – as long as the user has a stable internet connection – they don’t need to wait for any additional assets.

Scheme in Nuxt of Edward and the Ghost project per asset

Rome wasn’t built in a day, and neither was this project. We worked alongside each other to create the ominous first chapter of Edward & The Ghost in a way that does justice to this tale. Little Miss Robot brought modern-day technologies to the table to make the old school feel that Once Storytelling envisioned come to life.

Read other blog posts

Mobile app framework preview image
Development

All you need to know about mobile app frameworks

When creating a mobile app, an important decision we make early on is which framework to use as the foundation of the project. This involves choosing between developing a native app or a hybrid app. But what exactly is the difference?

Join our team